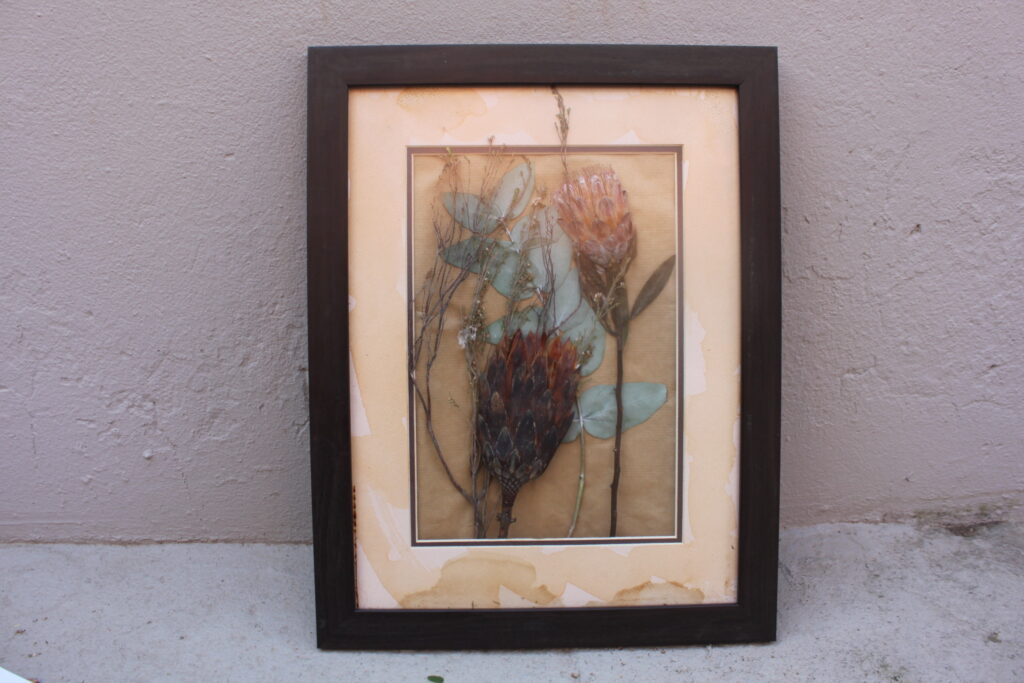
Pressed Proteas – preserve this beauty forever!

With so much flamboyant fynbos in the air, Life is a Garden has found a way for you to preserve this beauty forever. Pressed botanical collages are a timeless, elegant way to showcase your homegrown glory. Frame your stylish creations and hang them up in your home or office as organic art masterpieces for all to admire.
You will need:
- Frames with glass: You could use multiple smaller frames or go for one large artwork. Consider a sleek white or deep purple frame to compliment the more pastel colours of the preserved flowers.
- Backboard: This is what you will use to create your collage on. You can find thick cardboard in a variety of colours at your local stationery shop. Once again, a plain white or deep purple would work well for an overall sleek look, whereas bright greens or blue cardboard would give it more of a stylised feel.
- Clear-drying craft glue: Once all your plant pieces have dried, the glue will be used to stick them onto the cardboard sheet.
- Paper towels or fabric: These materials will be used on both sides of your flowers during pressing for protection and moisture abortion.
- Pressing materials: These could be big books or slabs of wood or bricks. Anything heavy will work well, provided you protect both sides of your flowers with a paper towel or fabric.
- Flowers: Fynbos works particularly well as their colour holds nicely and the added texture creates a more 3D look. Our top flower picks for pressing are:
-
- All fynbos and protea varieties
- Peony, roses, heliobore, Queen Anne’s lace, astilbe, seeded eucalyptus, dahlias, ranunculus, lavender, as well as peonies, roses, ranunculus, and hydrangea.
Top flower tip: Avoid using anthurium, orchids, lilies, plumeria, and succulents as they hold a lot of excess moisture, which makes them very challenging to preserve properly. Once pressed, white flowers will turn to a more winter white, so keep this in mind when selecting colours. Go for richly coloured blooms that will turn out in even deeper shades once preserved.
Method:
- The most important part of capturing the full shape and dimension of your protea is actually to press the parts individually. Once dried, you will be able to reconstruct your centrepiece flower to better mimic its original glorious form. As such, begin your pressing process by carefully taking apart the major elements of your protea. Other smaller flowers and foliage can be left as is, but it is nice to also have individually pressed leaves for later detailing and texture.
- Once you have all the pieces of your protea and accompanying flowers, prepare your chosen pressing environment by placing your paper towel or fabric on the bottom surface. Place all your plants on the paper towel or fabric and then place another layer of material over them.
- Place the top part of your chosen pressing slab/brick/book on top of your arrangement and allow it to completely dry for 3 to 4 weeks.
Top tip: To test if your plants have dried enough, see if they crack when you try to bend them. It’s a good idea to include some extra test pieces during the pressing process to use as your sacrificial plants. This will help you determine if your arrangement has dried properly.
- Remove all your plant pieces and begin planning your bouquet on the cardboard. You can really get creative here and use anything from calligraphy pens to ribbon and other craft paper to accentuate and personalise your design to suit your décor style.
- Once you are happy with the design, apply a small amount of glue to the back of the plant pieces and watch as your organic masterpiece comes to life.
- Place the cardboard back into the frame and secure the glass. Your botanical artwork is now ready for the wall!
- Head down to your GCA Garden Centre for a selection of truly flamboyant fynbos to add to your garden. Indigenous plants are always a win for the ecosystem as they home and feed our local wildlife and are naturally suited to our climate. Remember to check which fynbos is particularly suited to your area and grab a bag of fertiliser to boost their growth after transplanting.


Sorry, the comment form is closed at this time.